FeSwap Exchange
FeSwap, as a decentralized exchange, supports ERC20 token exchange completely with no exchange fee.
But FeSwap can still make competitive profits for its liquidity providers thanks to a creative internal arbitrage mechanism, which both reduces some security attack risk, and aslo works well as a new economic modal to drive the decentralized exchange.
FeSwap Baics #
Within FeSwap application, each swap pair has its owner, who is the bidding winner of this token pair NFT. Only the owner of the NFT is able to creat the respective token swap pair, so token pair creation is some constrained. In this way, the token pair quality could be guaranted in some level.
Swapping token within FeSwap is simple and easy. Enjoy surfing of Defi !
Guidance to Swap ERC20 Token #
** In following guidance, assuming you are using MetaMask wallet.
Step 2: Click "FeSwap" Menu.
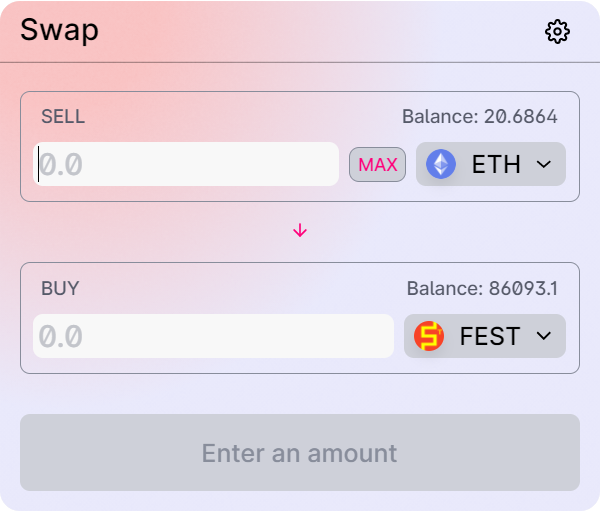
Now "Swap" window is displayed.
Step 3: Select the two tokens you want to sell / buy.
- Token balances are automatically displayed above the token area while it is selected.
- Click
↓toggles the position of two tokens.- Click
MAXbutton fills the maximum balance to the input area. Click the balance value of the "SELL" token does the same thing.
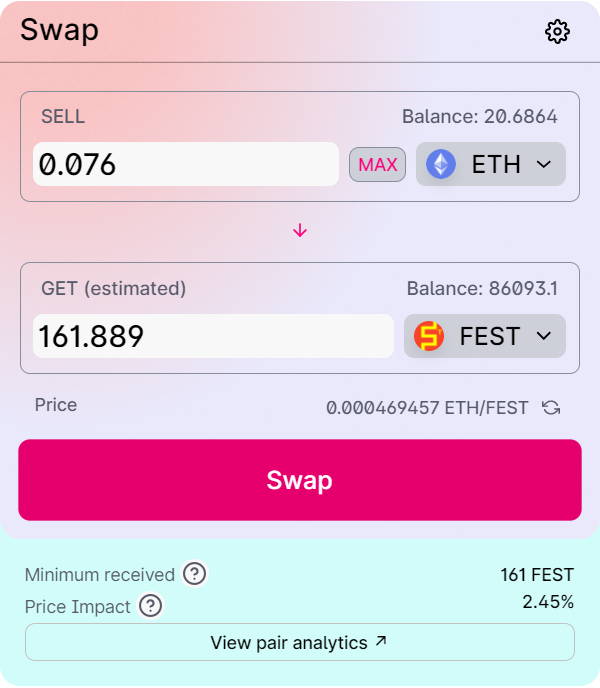
Step 5: Click the button "Swap".
- You just need to input one amount, the other amount is auto-fille by the app.
- Click to toggle the token price base.
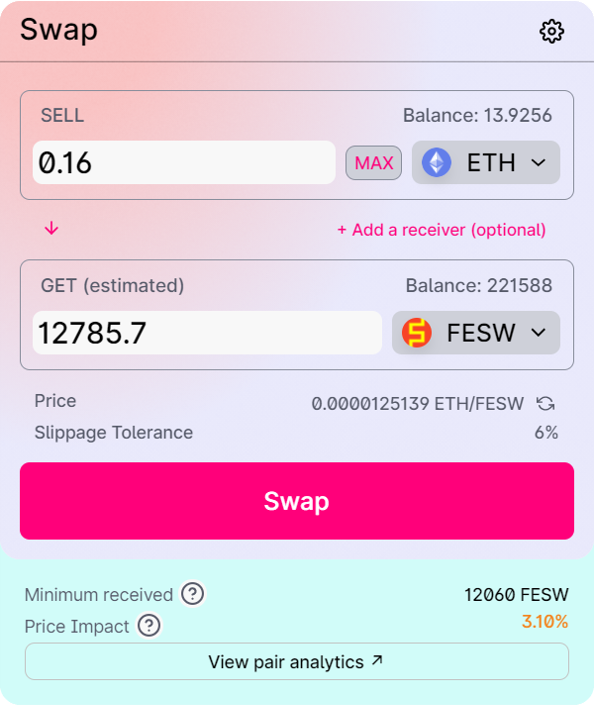
- Minimum Received: Minimum amount of output token you might receive based on the setting "slippage tolerance".
- Price Impact: Swap tranaction will impact the price in the token swap pair. This is estimated based on the current transaction and token pair status.
- Click to review you transaction settings.

Step 7: In Metamask, check the transaction content, sign and broadcast the tranaction.
Step 8: Waiting the transaction to be confirmed in the ETH network.
- In the lower part of the confirm window, some additional information are given. Please also check these information.
Setting of Token Swap #
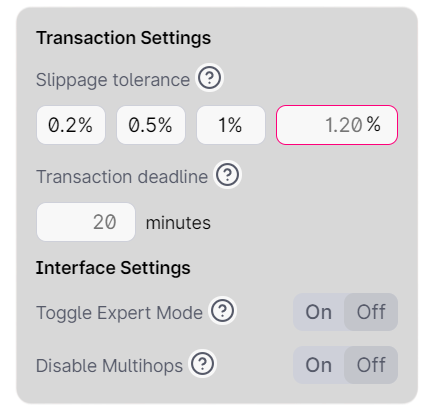
- Click at the top right corner of "Swap" Window. The "Transaction Settings" window as left will be shown. Four settings could be configured:
- Slippage tolereance: The price enforced for your tranaction is mathmatically relative to your transaction amount. This price change is also called slippage. You may set the maximum price slippage ratio you could accept. Normally slippage should not be more than 5%.
- Transaction deadline: The latest time you are willing to wait for your transactoin to be processed by the swap contract.
- Toggle Expert Mode: In expert mode, you could specify anyone as the receiver of swap output token, and some confirmation process could be skipped. Unless you are very familiar with FeSwap applicatoin, please do not activate expert mode.
- Disable MultiHops: In single hop mode, your swap will be processed by the swap pool exactly with your specified input and output token. In multiple hops mode, your tranaction could be processed by a few swap pools together, inputing your specified input token to the firts pool, and ouputing the ouput token from the last pool.

- You are asked to confirm the action toggling on expert mode.
- Click "Turn On Expert Mode" in the window left, and input exactly confirm to confirm that you are realy sure to swap in expert mode.
- Again, plese do not activate expert mode, unless you are very experienced with FeSwap applicatoin.
- If expert mode is activated, the prompt
"+ Add a receiver (Optional)" will be shown as in the left window. Click this prompt, you could specify a receiver address different from your current wallet address, or an ESN name adddress as the output token receiver.
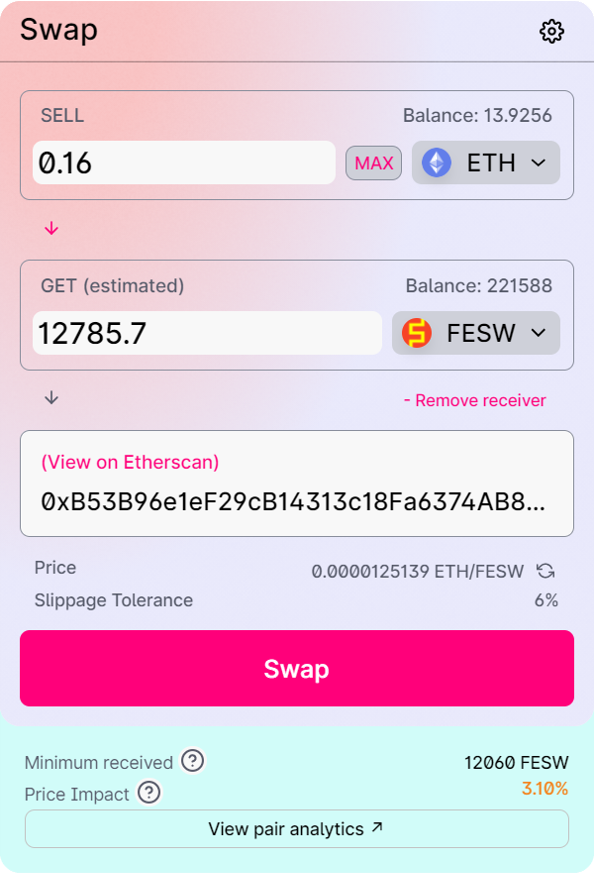
- After you click "+ Add a receiver (Optional)", an input area will be shown for you to set the receiver address or ENS name.
- You could click "- Remove receiver" to remove the input area, in this case, the output token is sent to your current wallet address as default.