FeSwap Mining
FESW is the governance token of FeSwap community. With FESW token, you are able to submit FeSwap governance proposals and vote on all these proposals.
By depositing your liquidity tokens, you are able to harvest some amount of FESW token, which is propotional to your liquidity token amount and depositing duration.
ETH🔗WBTC, ETH🔗USDT, ETH🔗FESW are the 3 token pair pools available to mining FESW in this phase. Later on new pools could be activated based on community proposals.
Guidance to Mining FESW #
** In following guidance, assuming you are using MetaMask wallet.
Step 1: Connect Metamask wallet.
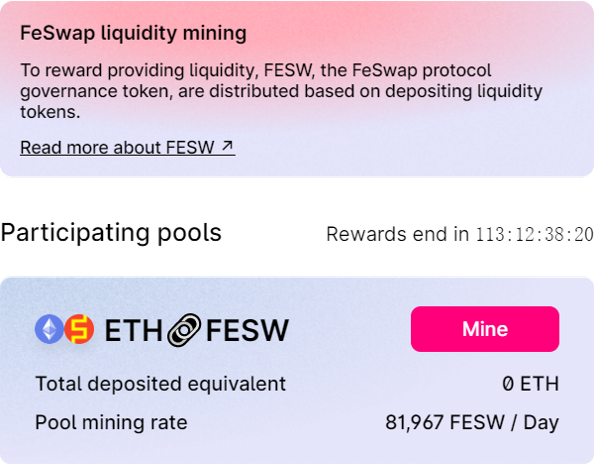
Step 2: Click "Mining" Menu.
Now the mining pools are displayed as the left window.
Step 3: Click the button "Mine" in each pool to start mining FESW.
Step 2: Click "Mining" Menu.
Now the mining pools are displayed as the left window.
Step 3: Click the button "Mine" in each pool to start mining FESW.
info
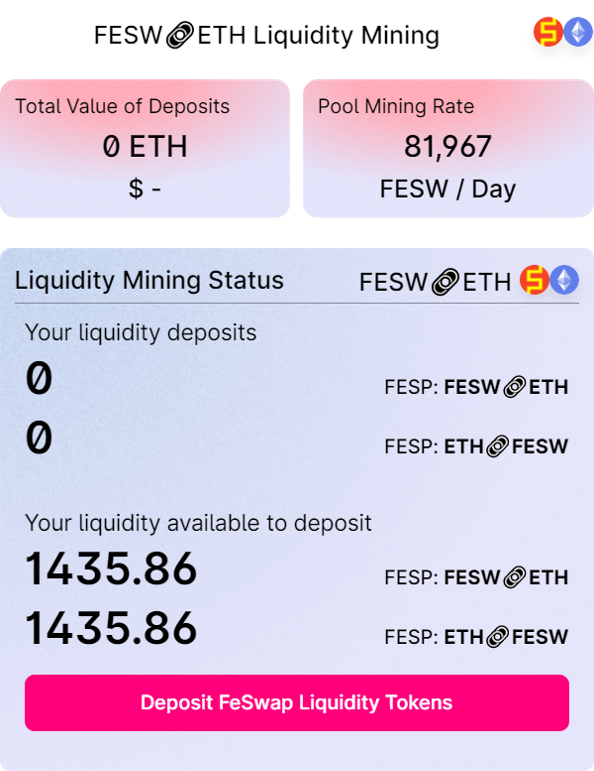
- In this window, the mining pool overall information are given, including the total deposited liquidity, and the mining output per day.
- Your liquidity amounts available to deposit and the liquidity amounts already deposited for mining are displayed here.
- The liquidity tokens of two sub-pools are separate and could be a little bit different in value, but they are counted same for liquidity mining.
info
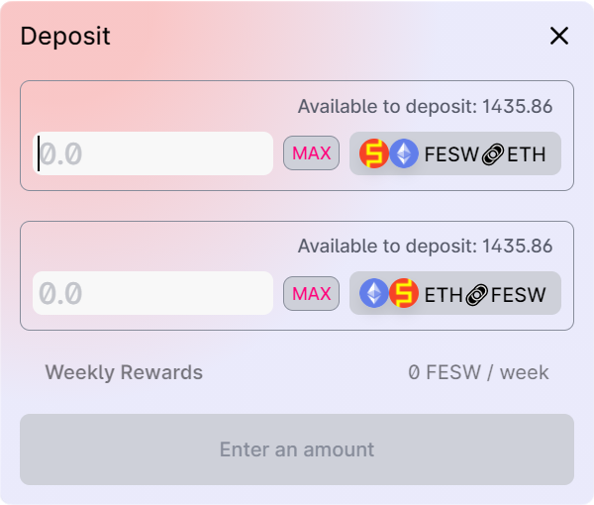
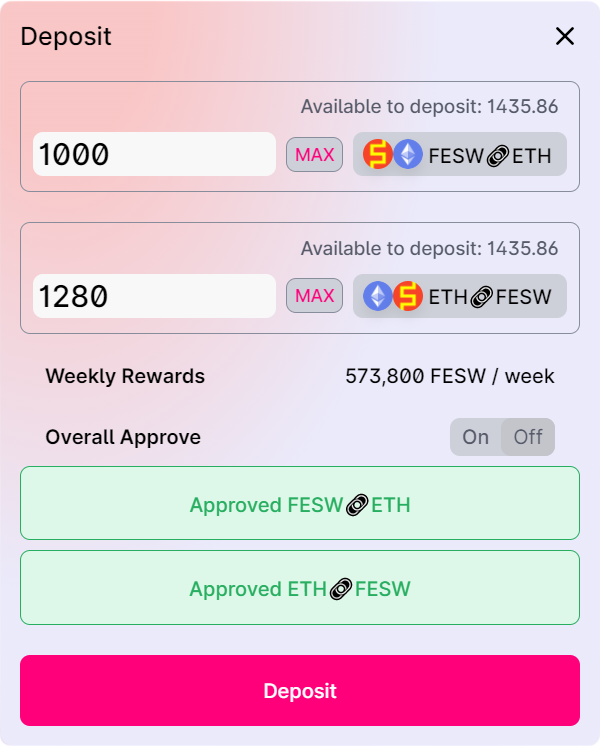
- In this "Deposit" window, you need to input the liquidity amount to deposit for mining. Your available liquidity is displayed above the sub-pool icons.
Step 5: Input the amount of the two liquidity tokens you want to deposit for mining.
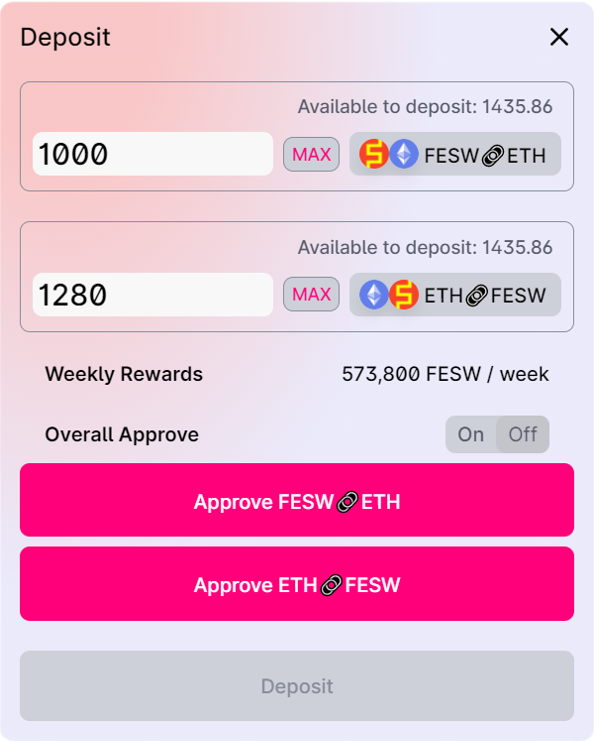
Step 6: Click the two buttons "Approve ..." to apppove the mining contract to transfer your liquidity tokens.
- You could click
MAXbutton to auto-fill all your liquidity to the input area.
Step 6: Click the two buttons "Approve ..." to apppove the mining contract to transfer your liquidity tokens.
- There are two kinds of approving: "Overall Approve" and "Transaction Approve".
- "Overall Approve": Once approved, all next mining deposits are approved.
- "Transaction Approve": Just approve to transfer the amount of current transaction, the approve signature is sent together with the mining transaction itself.
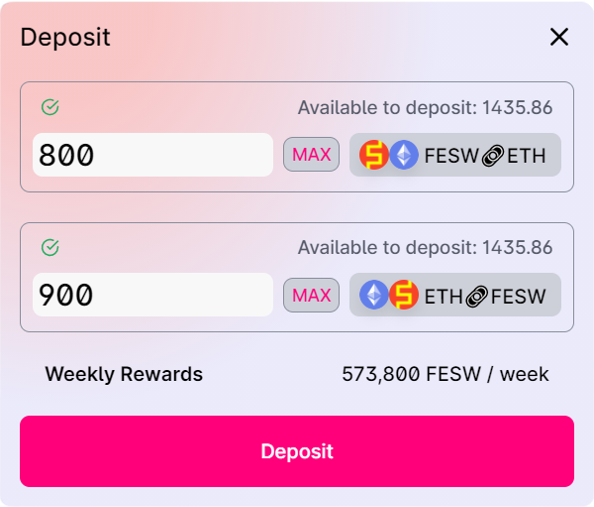
Step 7: Click the button "Deposit" to start your mining.
- Once you get the approve signature from your wallet, the "Deposit" window loosk like the left one, in which the button "Deposit" is clickable now.
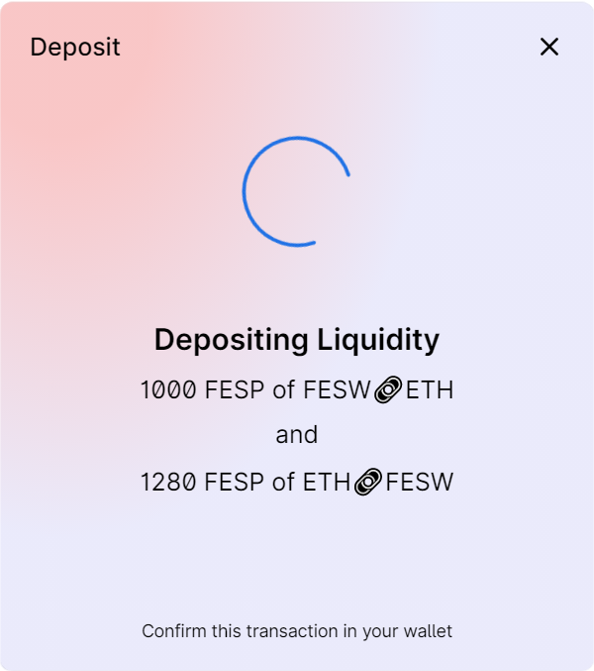
Step 8: In Metamask wallet, check the transaction content, sign and broadcast the tranaction.
Step 9: Waiting the transaction to be confirmed in the ETH network.
Step 9: Waiting the transaction to be confirmed in the ETH network.
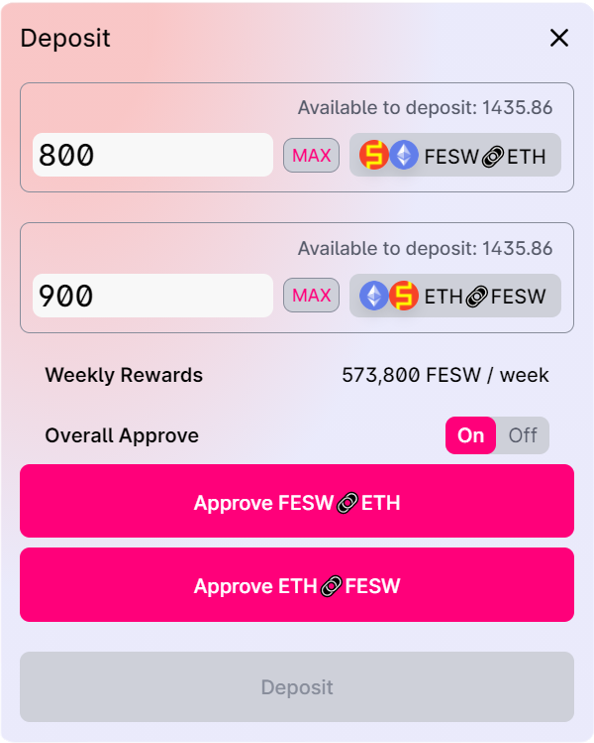
Step 6A: Click the two buttons "Approve ..." to apppove your liquidity token transfer on ETH network.
- You could toggle the approve mode by changing the "Overall Approve" setting.
- If "Overall Approve" is on, you need to approve your liquidity token tranfer on ETH network before starting mining.
- The window looks like the left while "Overall Approve" is on.
● This step takes some longer time as it is interacting with the ETH blockchain.
Step 7A: Click the button "Deposit" to start your mining.
- Once you have approved the transfer, the button "Deposit" is clickable now.