FeSwap Liquidity
By adding liquidity to the token pair liquidity pool, you could make profits from the token swap transactions.
FeSwap swap protocol charge no exchange fee to the swap tranactions, but FeSwap is still able to make competitive profits for its liquidity providers thanks to a creative internal arbitrage mechanism.
FeSwap token pairs are controlled somewhat by their corresponding owners, they can configure the setting of the token pair swapping, and could further influence the profit level of the token pair.
Add/Remove Liquidity #
Adding and removing liquidity are a little bit complex. FeSwap application provides friendly interface to interact with the token pair liquidity pools running on various EVM compliant blockchains, and further help users to manage their liquidity.
Liquidity Mining #
You could deposit your liquidity tokens to specific contract to mine FESW tokens, which represent the governance right of FeSwap community.
Only a very few of token pair liquidity tokens support FESW mining. Periodically FeSwap community could vote on proposals to add new liquidty tokens to the list supporting FESW mining.
Right now, 3 liquidty tokens can be deposited to mine FESW token, which are:
- ETH 🔗 WBTC
- ETH 🔗 USDT
- ETH 🔗 FESW
Guidance to Add Liquidity #
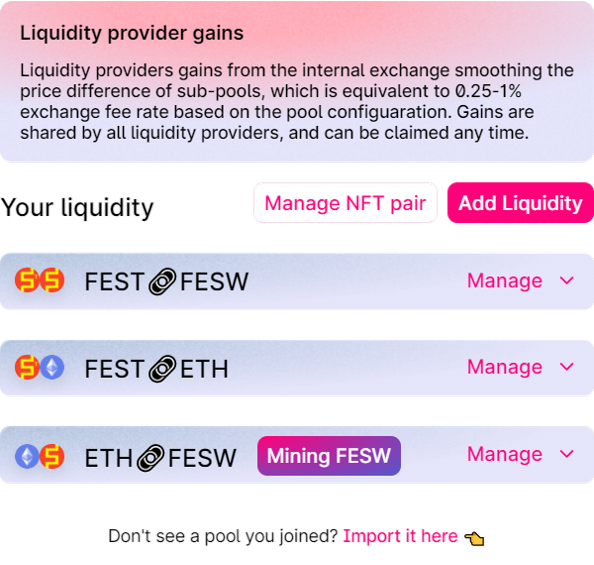
Step 2: Click "Liquidity" Menu.
Now come to your liquidity status window similar as displayed.
Step 3: Click "Add Liquidity" button.
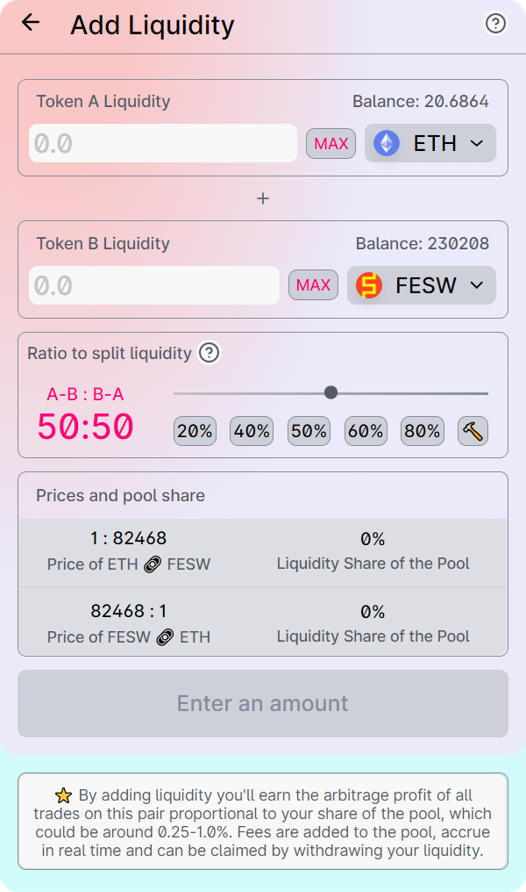
- If the token pair of the two selected tokens have not been created, the button
Pair Not Createdwill be shown.
- FeSwap token swap pair cannot be created at the first time it is added liquidity, instead it can only be explicitly createdly by its owner. To be the owner of any token swap pair, you need to bid token pair NFT 👈.
- If the token pair is created, the current token prices and your pool share within the token pair will be shown in the area
Prices and pool share.- Read the information at the bottom.
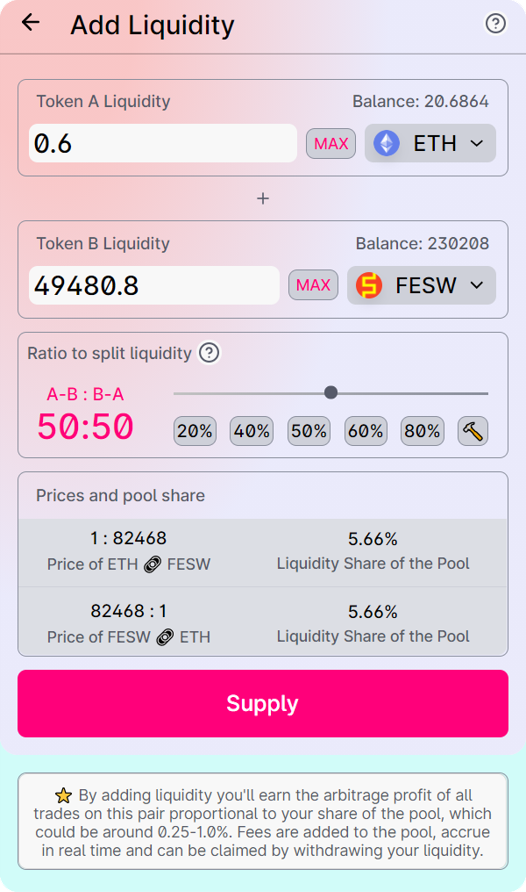
Step 5: Set the liquidity ratio between the two sub-pools.
- If this token pair has already been fuelled liquidities, you only need to input one amount, the other one is auto-filled. In this case, you need to carefully check the prices of the two tokens. If you are not happy with the prices, please quit to add liquidity.
- If the token pair has no liquidity, and you are the first person to add liquidity to this token pair, yout need to input two amounts. In this case, please check the amounts very carefully as these two amounts will determine the token prices within the token pair. If they are not appropriate in proportion, your asset could be lost as someone else could change the token proportion by conducting token swapping.
Step 6: Click the button "Supply".
- Click
🔨to use the ratio proposed by the application if you are not sure how to set the ratio.- Normally it is more favorable to add more liquidity to the sub-pool with less liquidity.
- Adding all your liquidity to just one sub-pool is some gas-saving. If your liquidiy is less than 0.2% of the token pair total liquidity, you could consider just adding all your liquidity to one sub-pool.
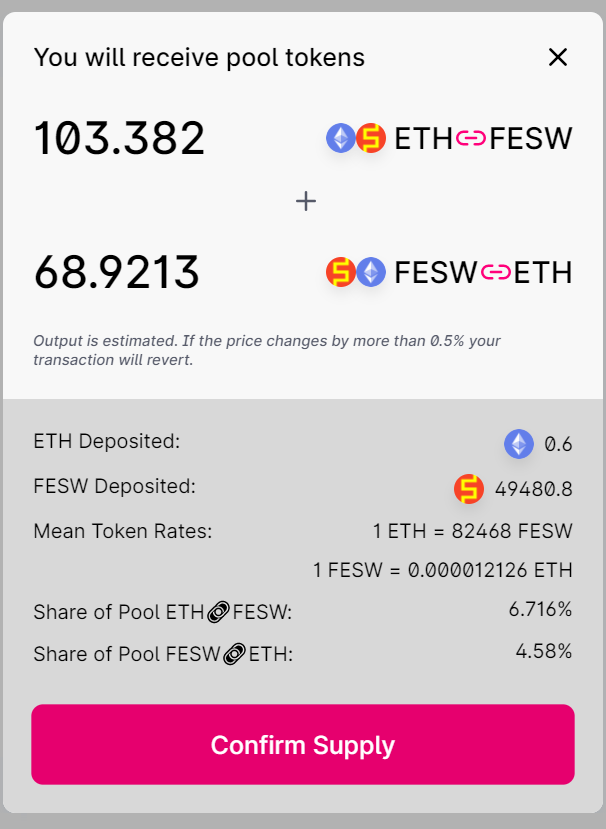
- In the upper part of confirm window, the two liquidity token amounts corresponding to the liquidity you are adding are displayed.
- In the down part of confirm window, some additional information are given, including token amounts you are adding, curent token price, and your liquidity share after your liquidity is added.
- Check all above information before you click the button
Confirm Supply.
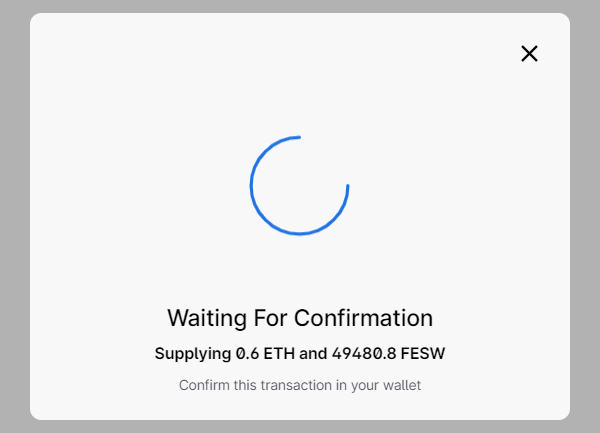
Step 9: Waiting the transaction to be confirmed in the ETH network.
Guidance to Remove Liquidity #
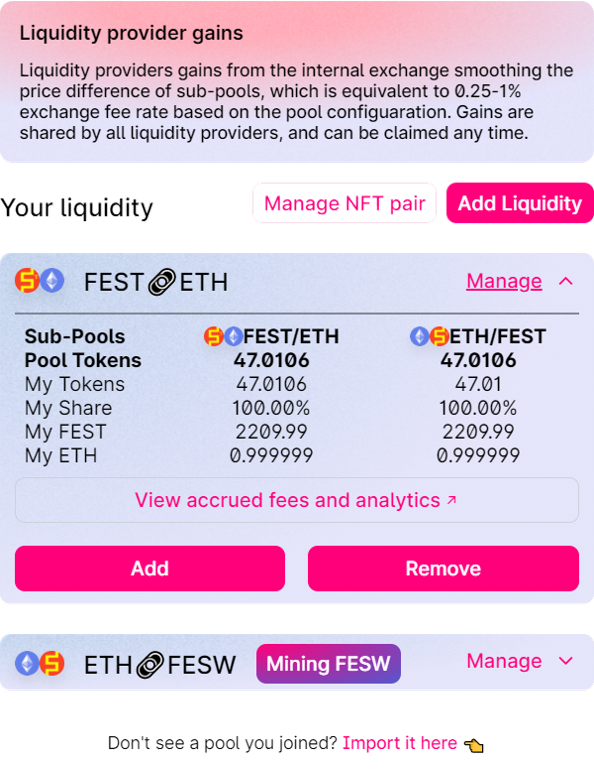
After you have added some liquidity, your liquidity status might look like the left window.
Step 1: Click "Manage "
Detailed liquidity status will be displayed, including liquidity token amounts, shares, and so on.
Step 2: "Remove" to remove liquidity.
Click the button "Add" if you want to add liquidity to this token pair.
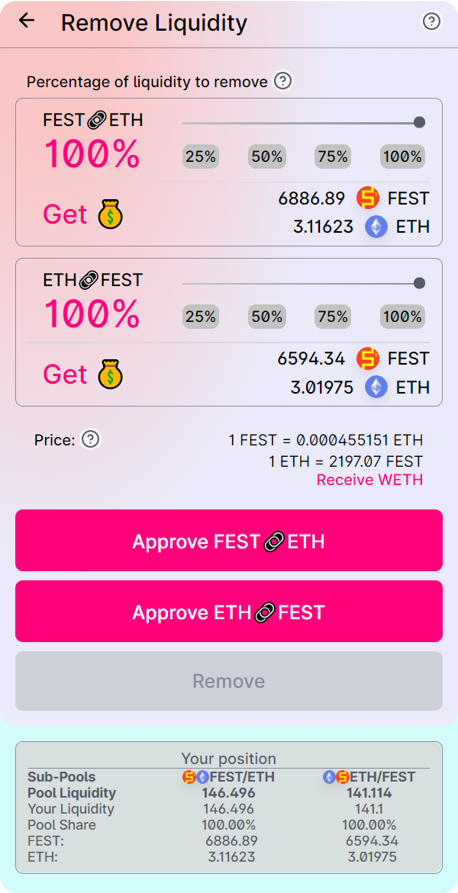
Step 4: Appove the FeSwap application to transfer your two liquidity tokens.
If any one of the liquidty ratio to remove is specified as 0, you just need to approve the other one of the two liquidity tokens.
Step 5: Click "Remove" to remove liquidity.